


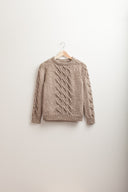
Rook
Pattern Specs
CONSTRUCTION
- The sweater is worked from the top down, beginning with a provisional cast on. It is joined in the round but worked back and forth with short rows to shape the front neck. When the neck shaping is complete, the piece is joined for working in the round. When the yoke is complete, the piece is divided for body and sleeves. The sleeve stitches are placed on hold while the body is completed. For the collar, the provisional cast on is undone and the collar is worked in the round from the live stitches. It is then tacked to the inside of the garment at the same time as it is bound off.
FINISHED DIMENSIONS
- 33½ (35¼, 38¾, 42¼, 46¾, 51¼)” circumference at chest
- Sample shown is size 35¼” with + 2¼” ease on model
Need help picking a size? See our resource page on Selecting a Sweater Size 101.
GAUGE
- 18 stitches & 28 rounds = 4″ in stockinette stitch with Size A needle(s), after blocking
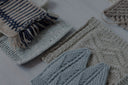
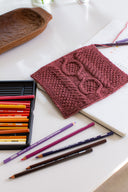
- 17-stitch panel from Sleeve Chart measures 3″ wide after blocking
- 39-stitch panel from Body Chart measures 6½” wide after blocking
NEEDLES
Size A (for Main Fabric):
- One each 16″ and 32″ circular needles and a set of double-pointed needles (DPNs)* in size needed to obtain gauge listed
- Suggested Size: 5 mm (US 8)
Size B (for Ribbing):
- One each 16″ and 32″ circular needles and a set of DPNs*, two sizes smaller than Size A
- Suggested Size: 4 mm (US 6)
*32″ circular needle can be used instead of DPNs if using the Magic Loop method for working small circumferences in the round (i.e. Sleeves)
Please note: the stitch patterns in this garment are charted only.
Pattern Materials
YARDAGE
- 950 (1005, 1100, 1250, 1385, 1510) yards of worsted weight wool yarn
YARN
- 7 (8, 8, 9, 10, 11) skeins of Brooklyn Tweed Shelter (100% American Targhee-Columbia wool; 140 yards/50g)
- Photographed in color Woodsmoke
Techniques
Errata
9 December 2019: Version 3.1
On page 7, the directions for finishing the neckband have been updated to the following:
Fold the neckband to the inside (with WSs facing each other) and bind off as follows: insert L needle tip into the stitch in the first row of ribbing, in the same column as first stitch on L needle, then work these 2 stitches together (either k2tog or p2tog depending on whether it is a knit or purl stitch), *insert L needle tip into the stitch in the first row of ribbing, in the same column as next stitch on L needle, then work these 2 stitches together, pass second stitch on R needle over first stitch on R needle to bind off 1 stitch; repeat from * to end of round. Take care to work loosely so that neck edge will not be too tight. Fasten off last stitch.
2 December 2015: Version 3.0
Substantial changes made to charts; 2/1/2 RC removed, replaced with 2/1/2 LC.
2 December 2013: Version 2.0
Rounds 14, 16 & 18 on the Sleeve Panel Chart and Body Panel Chart have been corrected to replace certain purl stitches with knit stitches.
Rook
Uncompromising Excellence in Every Detail