How to Knit: Shaping in Pattern
Knitting intricate cables, ribbing, and textures is a thrill – but how do you keep your stitch pattern straight when you need to increase or decrease?
Shaping in pattern can be a bit tricky if your pattern doesn't spell out which stitches should go where. We'll show you how to smoothly add and subtract stitches in ribbing, moss stitch, and cables to keep your stitch patterns on track.
Written Steps
Increasing
When we increase "in pattern" it means that as we acquire new stitches, we work them into the pre-existing pattern from the inside out towards the edge. For example, if you’re working a 1x1 ribbing pattern and the repeat between the marked increase points looks like: p, k, p, k, p, k, p (and so on), as you add new stitches to the outside, they become the next section of the pattern repeat, in order to keep the middle consistent: New Stitch (k), p, k, p, k, p, k, p, New Stitch (k). In this example, the new stitches would become knits because that is what keeps the pattern consistent. For the same reason, if the outermost stitches were knits, the new stitches would become purls.
Ribbing patterns are the easiest to incorporate stitches into since their stitch columns will stay the same once established. But with other texture patterns you have to do a little more thinking ahead. For instance with moss stitch, you may have stitches between markers that begin and end with knits on your needle. However, since moss stitch has you purling the knits and knitting the purls on right side rows, those edgemost stitches will actually be purled on the coming row. For that reason, when we add a new stitch to each side, they will need to be knits so that they fit with the pattern on the row currently being worked.
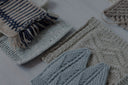
With stitch patterns that have more going on, like cables, where the chart doesn’t already have the shaping included it can be helpful to do even more advance prediction of how your stitches will fall by mapping out your increases directly onto a printout of your chart so that there is no guesswork involved in integrating the new stitches into the pattern. Sometimes that involves taking and cropping screenshots of the other end of the chart to create the next instance.
You’ll work backward from where the previous edge of the patterned stitches has been and start one stitch earlier and end one stitch later. Oftentimes when you’re increasing or decreasing in a cable pattern, you’ll need to just work some stitches in knit or purl as they appear until there are enough to work things like cable crosses where they need to be - your pattern will typically tell you how to handle things like this.
Decreasing
Decreasing in pattern is sometimes a little simpler than increasing - you’ll be starting the central pattern later and ending sooner each time you decrease, but some patterns require you to integrate the decreases into the pattern itself as well. When that’s true, you’ll look to see what the “surviving” stitch of the decrease would be worked as to tell you whether to decrease in knit or purl.
For instance, for a right-leaning single decrease, the stitch that lies on top of the fabric afterward will be the second of the two stitches involved, so before working the decrease you’ll want to determine what the second stitch on the left needle would be worked as. If we’re working in moss stitch and the second stitch on the left needle would be a knit on this row, we’ll work a knit 2 together. Likewise if it would be a purl, we’d purl 2 together.
For a left-leaning single decrease you’ll look to see how you’ll work the first stitch on the left needle on the current row since that’s what will lie on the front of the fabric after the decrease is completed. If the first stitch on the left needle would be a knit in this pattern, I’ll work a slip slip knit, while if it was needing to be a purl, I’d work a slip slip purl.
Conclusion
The big takeaway with both increasing and decreasing in pattern is to always contextualize what you’re doing in the established pattern of your fabric - you’ll always be looking from the center of what you’ve been doing outward to read how you’ll go on.
Shop our Latest Patterns
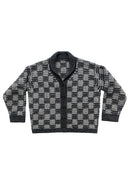

Checkers

Cyro
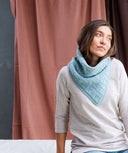
Diamants Cowl


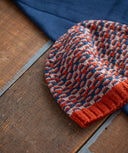
Diamants Hat


Matches


Diverge


Grooves

Loomed