How To: Patch Pockets
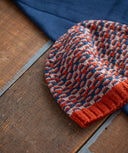
Patch pockets are one of the easiest types of pockets to knit, as they are worked separately from the garment and “patched” (i.e. sewn) onto the final fabric. This means that you can try your sweater on and decide exactly where (and even if) you want to have pockets. Extremely versatile, patch pockets open up the possibility for playing with color. Plan ahead and use your swatch as a pocket. And keep in mind that patch pockets are not only for garments — try them at either end of a generously-sized scarf to hold dog treats or other small treasures!

Step-by-Step
Step 1: Determine pocket placement
Begin by steam- or wet-blocking your completed sweater and pockets*. Once dry, try on your garment. With the help of some locking stitch markers or coilless safety pins, try out different placement points for your pocket(s) for best wearability.
*Do your pattern's pockets begin by picking up stitches from the finished fabric? The same principles below will apply for seaming the pocket sides and finishing.

Step 2: Secure pocket, ready for attachment
Lay your garment flat on your work surface, keeping the locking stitch markers in place from your garment try-on.
Using the original placement markers as guides, count how many stitches up from the bottom ribbing and in from the front band ribbing your pocket is placed (use an alternative reference point for pockets elsewhere on the garment, e.g. chest pockets). If you have a matching pocket to attach on the other front garment panel, make a note of your placement numbers to repeat on the opposite side.

Make sure that the bottom edge and the bottom pocket corners are aligned along the same row of stitches on the garment body, adjusting your locking stitch markers as needed.
Repeat the alignment check for the pocket’s vertical side nearest the front edge, making sure the bottom and top pocket corners for that side are attached on the same column of stitches. Repeat the side placement for the bottom and top corners on the opposite side of the pocket.

For example, our First Cardigan Sweater sample in color Ash has the bottom of the pocket lined up with the 7th row up from the top of the hem ribbing and between the 9th and 10th column of stitches in from the button band ribbing.

To help you stitch on the pockets in a straight line, place locking stitch markers at intervals along your chosen seaming row/columns as a guideline. Alternatively, use your tapestry needle and yarn in a contrasting color to baste a lifeline through the selected row and columns (or just outside of them) for guidelines.
Step 3: Seam pocket
Cut a length of your working yarn twice as long as three sides of your pocket perimeter (the left side, the right side, and the bottom). Thread this seaming yarn through your tapestry needle.
Count from one side of your pocket and find the “V” of the middle stitch on the bottom row of the pocket — this will be your starting point.
From your starting middle stitch, pull through half the amount of your seaming yarn; the reserved tail will be used to seam the other half of the pocket, in the other direction.

Using the “Top-to-Top” seaming technique, begin seaming outwards toward the pocket’s side. Fold and tuck the pocket’s garter-stitch selvedge underneath as you seam.

When you reach the pocket edge, change to work vertically up the pocket side using the “Side-to-Side” technique (otherwise known as mattress stitch).

Note that when seaming on the garment fabric side, you will work in the same manner as if you were sewing two pieces together at the edges — bring your tapestry needle under the bars of either one vertical stitch column (as shown in the photo) or between two vertical stitch columns; either is fine, as long as you remain consistent.

Repeat these steps for the opposite side of your pocket using the reserved tail of your seaming yarn, beginning again at the middle of the bottom edge and working outwards to the opposite bottom corner and then upwards to the pocket’s opposite top corner.

Try on your garment and test out your pocket! If you aren’t satisfied with your first pocket placement, you can always unpick your seaming stitches and make adjustments.
Once your pocket seaming is complete, return to the top edge of your pocket and weave in the end of your seaming yarn on the wrong side, being sure to have a snug (but not tight) join on that last stitch so that it finishes securely without any gaping at the pocket opening.
Repeat for the other side.
To finish, weave in any remaining ends from knitting your pocket on the wrong side of the garment (not the pocket). Steam block around the edges of your pocket to smooth the fabric and integrate your seaming. Visit our Blocking 101 resource for a complete guide.

If your garment has additional pockets, repeat the above steps for all pockets.
Shop our Latest Patterns


Checkers

Cyro


Diamants Cowl


Diamants Hat


Matches


Diverge


Grooves

Loomed