How To Knit: Lifelines
In this video tutorial, we show you how to create a lifeline in your knitting – a length of scrap yarn, thread, or a spare circular needle threaded through your stitches that acts as a placeholder in your project. Should you need to unravel back to fix a mistake in your work, a lifeline provides a secure point to hold a row or round of stitches in place, ready to be put back onto your needle.
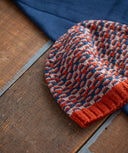
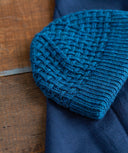
In projects with complex stitch patterns like lace, cables, or brioche, lifelines can be a lifesaver!
Written Steps
There are two types of lifelines that you can use in your knitting - proactive and reactive.
Proactive Lifelines:
A proactive lifeline is placed in the current row of stitches on your needle, to create a point to fall back to in case you make a mistake as you’re working.
Place lifelines at regular intervals or checkpoints in your project where you know you’ve got everything right, so that you can unravel back to that spot if you encounter problems further on . Remove previous lifelines once you’ve placed the next one, or leave them in place until it’s time to block your project.
To place a proactive lifeline, use a tapestry needle to thread a length of smooth scrap yarn (longer than the width or circumference of your project) purlwise through each stitch on your needle. Take care not to split the stitches or thread into the stitches below. If working in the round, start and end your lifeline at the beginning/end of the round.
Continue knitting as normal (being careful not to catch the lifeline yarn as you work) and the lifeline will remain in the row or round on which you placed it.
Some interchangeable needles have a small hole at the base of the needle tip or a slot in the cable itself specifically for placing lifelines. Insert a length of thread or dental floss, then knit your next row or round. As you work, the needle will automatically run the thread through your stitches.
Reactive Lifelines:
A reactive lifeline is placed after-the-fact, once you’ve realized you need to rip back to a certain spot. Place a reactive lifeline at least a row or round below whatever mistake it is you’d like to fix.
Thread a length of scrap yarn or a spare circular needle (in a smaller size than your working needle) through all of the stitches in the row or round you’ve identified, running through the right leg of each stitch as if to purl. If working in the round, start and end your lifeline at the beginning/end of the round – you can find this by following the column of the first stitch after your beginning of round marker down to the round where you’re placing the lifeline.
Lifelines in Brioche Stitch:
If your project is in brioche stitch, you’ll want to be careful to also catch the yarn-over “shawl” of each brioche knit stitch when placing a lifeline. To make sure you’re catching all of the stitches on the same row or round, follow the path of the yarn that forms the yarn-over “shawls” as it goes over the knits and into the purls across the row.
Unraveling:
Once you’re ready to unravel, remove your stitches from your working needles and frog back until you reach your lifeline. If you’ve used scrap yarn or thread for your lifeline, slide your working needle back through the held stitches, running through the right leg of each stitch as if to purl. Once your stitches are back on your working needle, you can remove the lifeline, or leave it in place. If you’ve used a spare circular needle for your lifeline, simply knit the stitches directly off of that needle with your working needle.
Shop our Latest Patterns


Checkers

Cyro


Diamants Cowl


Diamants Hat


Matches


Diverge


Grooves

Loomed