How To Knit: Italian Tubular Cast On
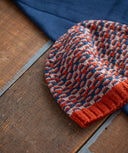
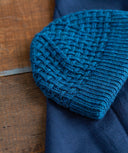
Add this elegant cast on to your repertoire for pieces with incredible polish and elasticity. Unlike traditional tubular cast ons, this special technique uses no waste yarn, so you are ready to begin knitting once you have the right amount of stitches, no snipping required! This cast on creates a clean edge of 1x1 ribbing that resembles ready-to-wear machine knitting. Beautiful, durable and professional looking, the Italian Tubular cast on is ideal for the brim of hats or cuffs of sleeves — anywhere you need a finished edge with a little stretch.
Written Steps
Cast on using a needle one to two sizes smaller than you'll be using to knit your ribbing.
Step 1: Make a slip knot (optional) leaving a tail 2 - 3 times longer than the desired width of your cast on. Slip the slip knot onto the needle and hold in your R hand ready to knit. Secure the tails from the slip knot by holding them against the needle with your R hand. With your index finger and thumb of your L hand extended to create an "L", position the working yarn in your L hand, with the working yarn draped over your index finger and the tail yarn draped over your thumb, holding the ends against your palm. The yarn is held in a diamond shape, with the slip knot positioned halfway between your thumb and index finger, and the needle tip positioned above the yarns, pointing to the middle of the diamond shape.
(Note: This video shows the cast-on for a flat swatch with an optional knit selvedge stitch at each end. You can reverse the following steps to start with Step 3 and end on Step 2 if you prefer.)
Step 2: Create a Knit Stitch: Wrap the tail yarn over the needle by moving the needle tip outside of the diamond toward your thumb and over the tail yarn, then back to the center of the diamond under the tail yarn. Move the needle tip outside of the diamond toward your index finger and over the working yarn, back to the center of the diamond under the working yarn, then forward under the tail yarn and returning to the center. Keep the loop on the needle and maintain an even tension, ready to cast on a new stitch.
Step 3: Create a Purl Stitch: Wrap the working yarn over the needle by moving the needle tip outside of the diamond toward your index finger and under the working yarn, then back to the center of the diamond. Move the needle tip outside of the diamond toward your thumb and over the tail yarn, back to the center of the diamond under the tail yarn, then back under the working yarn and returning to the center. Keep the loop on the needle and maintain an even tension, ready to cast on a new stitch.
Repeat Steps 2 & 3 until the desired number of stitches have been cast on, ending with Step 2 for an odd total number of stitches and Step 3 for an even total number of stitches. Finish with a backwards loop to secure your cast-on row (see video for tip); this backwards loop is the final stitch in your total stitch count.
Work the optional tubular rows below, or switch to your larger needle and start your ribbing.
To work the optional tubular rows:
Note: You'll be working three tubular rows, knitting the knits and slipping the purls with yarn in front (wyif) on every row. The following instructions are written for an odd number of stitches.
If you are working over an even number of stitches, omit Rows 1 & 3 and instead work Row 2 three times, omitting the last knit stitch before the selvedge stitch on each row. If not using selvedge stitches, simply ignore the instructions for them.
Row 1: With working yarn, knit 1 (selvedge stitch), *slip 1 purlwise with yarn in front (pwise wyif), knit 1; repeat from * to last 2 stitches, slip 1 pwise wyif, knit 1 (selvedge stitch). Note that on this first row, your knit stitches will be mounted backwards on the needle, so you'll need to knit into the back loop to untwist them.
Row 2: Knit 1 (selvedge stitch), *knit 1, slip 1 pwise wyif; repeat from * to last 2 stitches, knit 1, knit 1 (selvedge stitch).
Row 3: Knit 1 (selvedge stitch), *slip 1 pwise wyif, knit 1; repeat from * to last 2 stitches, slip 1 pwise wyif, knit 1 (selvedge stitch).Switch to your larger needle and start your ribbing.


