How To Knit: Grafting
Learn how to join live stitches with grafting! This technique sews two sets of live stitches together to mimic a row of knitting and is often used on sock toes, underarm stitches in bottom-up seamless sweaters, and anywhere else you want to join two pieces of knitting without a visible seam.
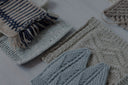
In this tutorial, we show you how to graft stockinette stitch, garter stitch, and ribbing or other textured stitches in a few simple steps.
Written Steps
Grafting in Stockinette Stitch
Pieces to be joined are live on needles, with right sides facing out and both needle tips pointing to the right. Use a length of yarn approximately four times the length of the finished seam, attached to the right edge of the fabric on the front or back needle (use the yarn the piece was knitted with, or attach a new length of yarn). Thread the yarn onto a blunt tapestry needle and follow the instructions below, working from right to left (note that you will work into each stitch two times):
Step 1: Insert tapestry needle into first stitch on front needle as if to purl; pull yarn through, but do not slip this stitch from needle.
Step 2: Insert tapestry needle into first stitch on back needle as if to knit; pull yarn through, but do not slip this stitch from needle.
Step 3: Insert tapestry needle into first stitch on front needle as if to knit, slipping this stitch off the needle. Insert tapestry needle into next stitch on front needle as if to purl and pull yarn through this stitch, tugging it gently.
Step 4: Insert tapestry needle into first stitch on back needle as if to purl, slipping this stitch off the needle. Insert tapestry needle into next stitch on back needle as if to knit and pull yarn through this stitch, tugging it gently.
Repeat steps 3 and 4 until a single stitch remains on each needle, adjusting the tension of the sewing yarn every few stitches so that it mimics the tension of the knitting. To finish, insert tapestry needle into final stitch on front needle as if to knit, slipping it off of the needle. Now, insert tapestry needle into final stitch on back needle as if to purl, slipping it off of the needle. Pull the yarn through and fasten off gently so as not to distort the stitches.
Grafting in Garter Stitch
Set up pieces and yarn tail as for stockinette stitch grafting, then follow the steps below:
Step 1: Insert tapestry needle into first stitch on front needle as if to purl; pull yarn through, but do not slip this stitch from needle.
Step 2: Insert tapestry needle into first stitch on back needle as if to purl; pull yarn through, but do not slip this stitch from needle.
Step 3: Insert tapestry needle into first stitch on front needle as if to knit, slipping this stitch off the needle. Insert tapestry needle into next stitch on front needle as if to purl and pull yarn through this stitch, tugging it gently.
Step 4: Insert tapestry needle into first stitch on back needle as if to knit, slipping this stitch off the needle. Insert tapestry needle into next stitch on back needle as if to purl and pull yarn through this stitch, tugging it gently.
Repeat steps 3 and 4 until a single stitch remains on each needle, adjusting the tension of the grafting yarn every few stitches so that it mimics the tension of the knitting. To finish, insert tapestry needle into final stitch on front needle as if to knit, slipping it off of the needle. Now,insert tapestry needle into final stitch on back needle as if to knit, slipping it off of the needle. Pull the yarn through and fasten off gently so as not to distort the stitches.
Grafting Ribbed or Textured Fabrics
Set up pieces and yarn tail as for stockinette stitch grafting, then follow the steps below:
Look at the stitches on each of the needles in pairs as they come up. If the next two stitches are the same, you’ll want the direction in which you bring your needle through each of the stitches to be different. For example, if the following two stitches on your front needle are both knits, you’ll bring your needle through, as a “knit, purl”. Likewise, when the first two stitches on your back needle appear as purls as you’re viewing them from the wrong side, you’ll bring your needle through as a “purl, knit.”
However, if the pair of stitches on your needle consists of two different stitches, the direction in which you bring your needle through them will be the same. If the first is a knit and the second is a purl, you’ll bring your needle through both of them knitwise. Similarly, if the first is a purl and the second is a knit, you’ll bring your needle through both of them purlwise.
The first stitch will set the direction in which you enter as you’ll always go into the first stitch in the direction in which it appears, then you’ll exit the second stitch in the opposite direction from how that stitch appears. Continue across until you have grafted all of the stitches. This allows you to graft all kinds of ribbing and textured stitches neatly and easily! Note that the two edges coming together will be staggered by a half-stitch because of the nature of their construction, but this still creates an attractive “close enough” join in pattern.
Shop our Latest Patterns


Checkers

Cyro

Diamants Cowl


Diamants Hat


Matches


Diverge


Grooves

Loomed