How To Knit: Dip Stitch
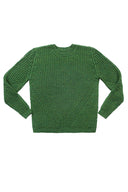
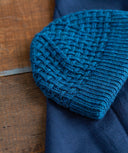
Learn to knit the dip stitch! This simple technique creates an elongated V on the right side of the fabric as well as an eyelet effect at the base of each V.
Written Steps
Dip: Insert R needle tip under the two strands of yarn between needles (these strands connect the first column of stitches on R needle to the first column of stitches on L needle) from front to back and pull through a new loop as if to knit, place this new loop on R needle. (1 stitch increased)
Note: The stitch created here will be slipped over the next few rounds. Tension on this stitch should be even, but on the looser side so the fabric does not pucker.
Work the following row or round in stockinette, slipping all dipped stitches purlwise with the yarn in back.
On the next row or round, work to one stitch before the dipped stitch, slip the next 2 stitches at once as if to knit 2 together, then transfer what is now the first stitch on the right needle back to the left needle and knit 2. Then use your left needle to pass the third stitch on the right needle (the dipped stitch) over the 2 stitches just knit and off the right needle. Repeat for any other dipped stitches on the needle, restoring the previous stitch count.


